
Commercial disclosure: We may earn a commission if you purchase through certain links on this page.
An Eskiin wall-mounted head is a reasonable DIY swap if your shower has an accessible standard male 1/2-inch shower-arm thread and enough clearance. The Eskiin handheld is a different setup: a bracket, hose and detachable wand, with the hose ends and rubber gaskets installed in the correct places. Do not assume the brand’s “fits 99%” statement covers an unusual built-in shower, proprietary fitting or damaged plumbing.
Scope: A U.S. home or rental, with current Eskiin wall-mount and handheld installation guidance checked October 20, 2026. These are manufacturer-guided preparation and troubleshooting steps, not a claim that HomeChoiceWorks physically installed a unit. Follow the instructions packed with your exact revision, especially for seals and flow restrictors.
Before buying: identify which connection you actually have
Eskiin’s support documentation says its fixed head uses a female threaded inlet that screws onto a standard male shower arm; its handheld wand has a male connector at the handle base for the female hose end. The company describes compatibility with common U.S. 1/2-inch showers, but its percentage compatibility claim is not an inspection of your particular bathroom.
| Existing setup | What to check | Safer next action |
|---|---|---|
| Conventional fixed head on exposed shower arm | Exposed threads, sound arm, room for a roughly 118 mm face and 136 mm head assembly (manufacturer dimensions; confirm the version) | Wall mount is the simpler candidate |
| Standard shower arm, but need a movable sprayer | Bracket angle, where the 4.5 ft supplied hose hangs, clearance from shelves and tub edge | Consider the handheld kit; check hose reach before ordering |
| Built-in rain panel, concealed piping, custom rail or nonstandard connector | Whether there is actually a removable standard shower-arm connection | Request written fit guidance from Eskiin or a plumber; do not force an adapter |
| Rental or older plumbing | Landlord rules, corroded/seized threads, loose arm or prior leaks | Obtain approval when required and stop if the pipe moves at the wall |
Eskiin’s handheld offer lists a 4.5-foot hose and a universal wall mount. The support guide lists the head dimensions and connection types. The 4.5-foot figure is hose length, not guaranteed reach to the shower floor: bracket height, slack and body position reduce practical reach.
Inventory the hardware before removing anything
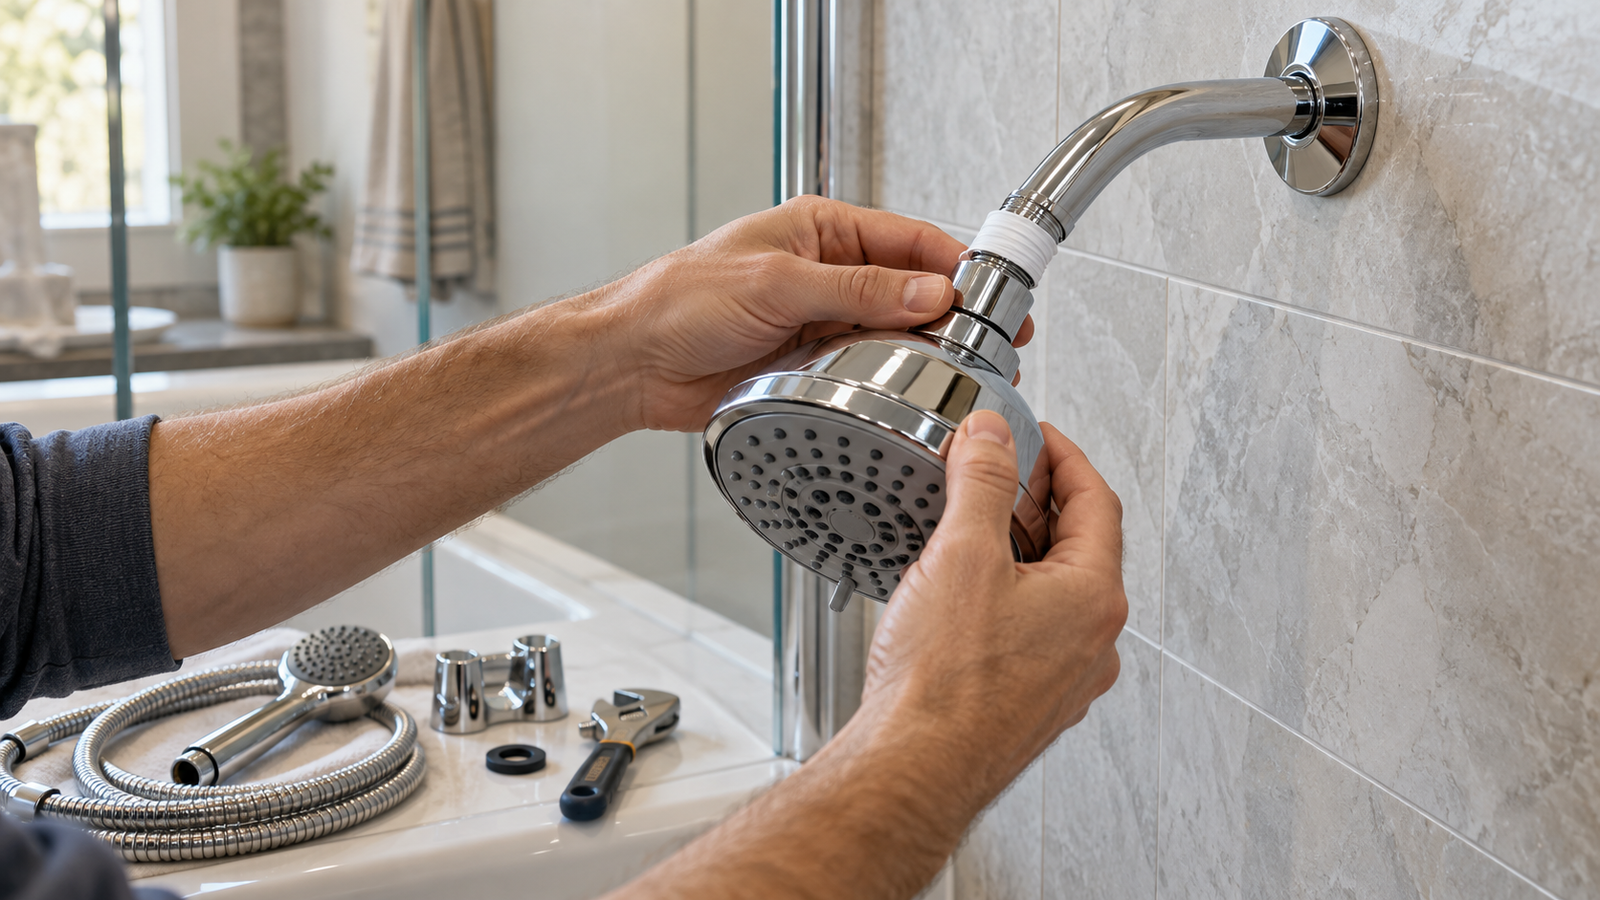
The manufacturer’s packing list separates the two kits. The wall-mount box includes the head, a pre-installed filter, wrench, plumber’s tape and installation directions. The handheld kit adds a hose, mount, pre-installed base filter and pre-installed ceramic face filter. Look for any protective shipping cap and make sure seals and filter housings appear intact. If parts are missing or the supplied head is a different revision, pause and contact Eskiin before opening the existing plumbing connection.
Photograph the original shower-arm connection and the existing assembled setup. Save the old showerhead, any working washers and your rental’s required components. This makes it easier to restore the room, diagnose a leak or document a mismatch without relying on memory.
How to install the Eskiin wall-mounted showerhead
These steps follow the manufacturer’s Installation FAQ. They apply only where the original head can be removed without stressing the wall pipe.
- Turn the shower off, let hot metal cool and protect the shower tray from dropped parts.
- Support the arm near the wall while removing the old head counterclockwise. If the arm or wall fitting starts turning, stop rather than using extra leverage.
- Inspect and gently clean the exposed shower-arm threads; do not screw a new head onto cracked, bent or heavily corroded threads.
- Remove the product’s protective shipping cap if present. Check that the supplied filter is seated as delivered.
- Following Eskiin’s instructions, wrap the shower-arm threads with the supplied plumber’s tape two or three times, in the tightening direction. Keep tape clear of the water passage.
- Start the head squarely by hand and turn until snug. Avoid cross-threading and avoid wrench force beyond the enclosed manufacturer’s directions.
- Run the shower gradually, looking for seepage at the head-to-arm joint and at the wall. If a connection seeps, turn water off, reseat it and tighten only slightly. Persistent leakage is a stop condition.
This is a replaceable fixture connection, not permission to modify behind-the-wall piping. The merchant calls it a no-plumber swap; that is conditional on intact standard threads and safe access. A seized or wobbly arm changes the job.
How the Eskiin handheld installation differs
The handheld kit connects its holder/bracket to the shower arm, then connects the hose between holder and wand. Crucially, Eskiin’s hose-specific FAQ distinguishes the ends: the flat-edged/hex end belongs at the holder and the smooth rounded end at the handheld head. It warns that putting the hex end directly against the wand can cause leaks.
- Confirm the shower arm accepts the supplied bracket and that the planned hose loop clears shelves, faucets and doors.
- Turn off the shower and remove the former head/handheld bracket carefully. Clean the exposed arm threads.
- Fit the Eskiin holder according to the enclosed guide, using plumber’s tape on the shower-arm-to-holder connection as Eskiin directs.
- Check that the supplied gaskets sit flat inside the two hose connections. Connect the flat-edged end to the holder and smooth end to the wand; hand tighten each end until snug.
- Hang the wand securely, allow the hose to fall without a kink, then turn on the water at a low flow.
- Inspect the holder-arm joint, both hose nuts and the filter-handle housing for leaks. Adjust a displaced gasket or wrong hose-end orientation before resorting to extra tightening.
Do not use plumber’s tape on the hose joints: Eskiin says those are gasket-sealed connections, and tape is meant for the holder-to-arm connection. Its FAQ also documents a specific mesh-screen and flow-restrictor stack. Keep the restrictor in its intended position, especially for state-limited models; do not remove it to advertise a higher flow rate.
Leaks, low flow, wrong fit: the five-minute diagnostic
| Symptom | Likely area to inspect | Do not do this |
|---|---|---|
| Drip at fixed-head inlet | Arm threads, alignment, tape, damaged mating surface | Force a cross-threaded head tighter |
| Drip at handheld hose nut | Missing/twisted gasket, reversed hose ends, loose joint | Wrap tape over a gasket joint as a substitute |
| Sudden weak spray or humming | Screen/restrictor seating, supply pressure, debris, pre-installed filter | Remove required flow controls without manufacturer or code guidance |
| Movement or moisture where arm meets wall | Behind-wall joint or corroded arm | Continue running water or attempt a cosmetic patch |
The manufacturer documents hose-gasket placement, the restrictor arrangement and unusual hum/low-flow problems in its support center. A general online installation article cannot identify a concealed leak; turn the water off and contact the property manager or a licensed plumber when the wall connection is loose, wet or damaged.
Water flow and California’s version matter
Eskiin says its showerheads shipped to California include a 1.8 gallons-per-minute restrictor. For context, the EPA WaterSense showerhead program uses a 2.0 gpm-or-less efficiency criterion, but that does not prove that a specific Eskiin product carries a WaterSense label. Verify the exact state-compliant model and do not infer that a perceived stronger spray means increased total water flow.
Is a DIY swap the right decision?
- Proceed: a removable ordinary fixed head, undamaged arm, accessible 1/2-inch connection and the correct wall/handheld kit.
- Clarify first: nonstandard mount, very high fixture placement, existing multi-outlet diverter, unusually short hose reach or a rental requiring permission.
- Do not proceed alone: turning wall pipe, persistent seepage, concealed leak, seized corroded fitting or uncertain thread adaptation.
For someone who only needs basic fixed-head filtration, the Eskiin wall-mount option is mechanically simpler than a hose-and-holder setup. If you need reach to rinse a tub, wash a pet or help a seated user, evaluate actual hose reach and grip before paying for the handheld model.
Once you have verified that the fixed Eskiin is the intended fit, you can review the manufacturer’s wall-mounted showerhead offer. The tracked link was supplied for a wall-mount sales page; it is not a verified handheld or replacement-filter purchase link.
Sources and freshness: Manufacturer installation, thread, parts and hose-end details from Eskiin Help Center; handheld hose specification from Eskiin’s handheld listing; water-efficiency context from U.S. EPA. Checked October 20, 2026. A live home-specific fit check and WordPress rendering have not been performed.
Keep researching
More decision guides from the same topic area.
Best Filtered Shower Heads: Evidence, Fit and Filter Costs Compared
Best filtered showerhead: a conditional shortlistStart with Aquasana AQ-4105 if you want a handheld option with a published model-family…
Read guide →
Eskiin Shower Head Reviews: Filtration Evidence, Costs and Who Should Buy
The short answerEskiin is worth considering when you want a wall-mounted showerhead with a replaceable cartridge and are comfortable…
Read guide →
Eskiin vs Jolie Shower Head: Evidence, Fit and Real Refill Cost
The short answerFor a U.S. fixed-head shower, Eskiin appears less expensive in the specific 90-day autoship snapshot examined, while…
Read guide →